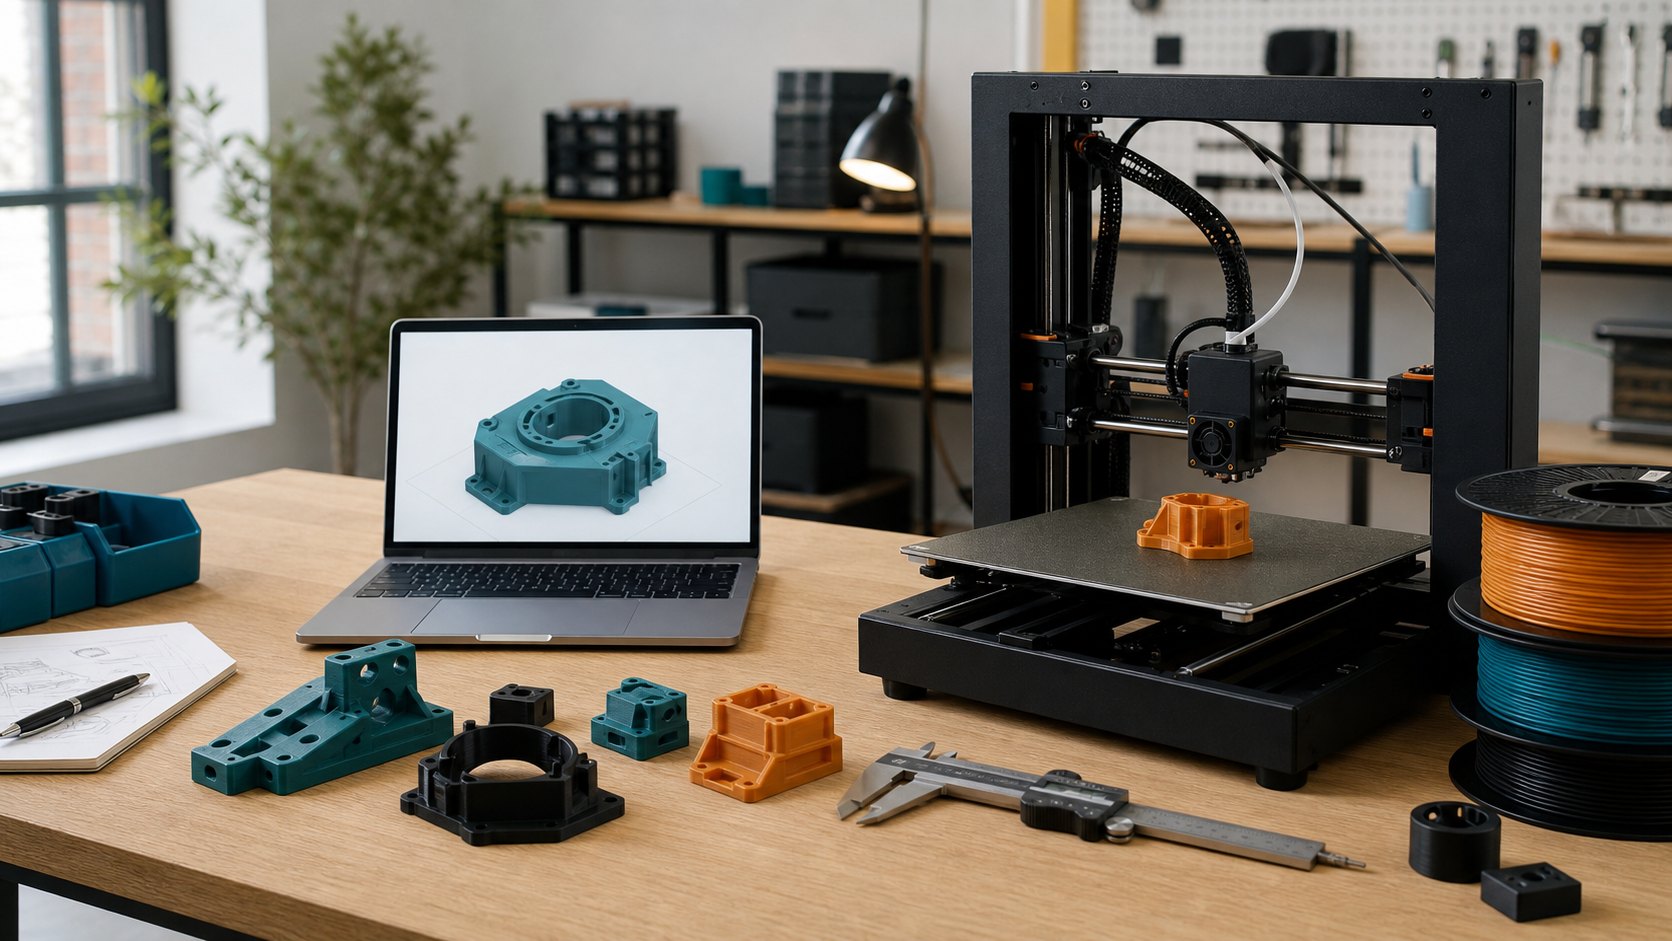
Preparing a 3D model for printing is not about making the file perfect in an abstract CAD sense. It is about making the file clear enough for the print route, material, strength and finish to be quoted sensibly. A model that looks fine on screen can still be the wrong size, too thin, difficult to support, unnecessarily expensive or missing the real-world context that decides whether FDM printing, resin printing or a larger build route is the better fit.
The useful starting point is simple: send the file in a format that preserves the right information. STL is common and works well for many mesh-based prints. OBJ and 3MF can also be useful, especially where colour, multiple parts or richer mesh data matters. STEP, STP, IGES and IGS files are often better when exact CAD geometry, holes and dimensions are important. If you are sending a set of parts, zip the project together so the quote request keeps every related file in one place.
Before uploading, check the scale. Many failed quote conversations start with a model that has exported in inches when the customer expected millimetres, or a part that imports ten times too large. Open the exported file in a slicer or viewer and check the bounding box dimensions. If the part is meant to be 80mm long, make sure the file is 80mm long. For large FDM prints, include the maximum outside dimensions in the quote notes as well, especially if the part is near the 500mm x 500mm x 500mm build size.
Wall thickness is the next big check. Thin walls may appear printable in CAD but fail during printing, support removal or normal handling. As a broad design habit, avoid paper-thin shells, tiny pins and decorative edges unless they genuinely need to be that small. Functional parts usually benefit from enough wall thickness around screw holes, load points and clips. Visual prototypes can sometimes be lighter, but the file should still have enough material to survive being cleaned, packed and used.
Clearances matter whenever parts fit together. A hole that is exactly the same size as a peg in CAD is usually not a working fit after printing. FDM layer lines, resin cure behaviour, material shrinkage and printer calibration all affect the final result. If you have a critical sliding fit, push fit, bearing seat or screw location, say so in the notes. The quote can then be planned around the practical requirement instead of treating every surface as equally important.
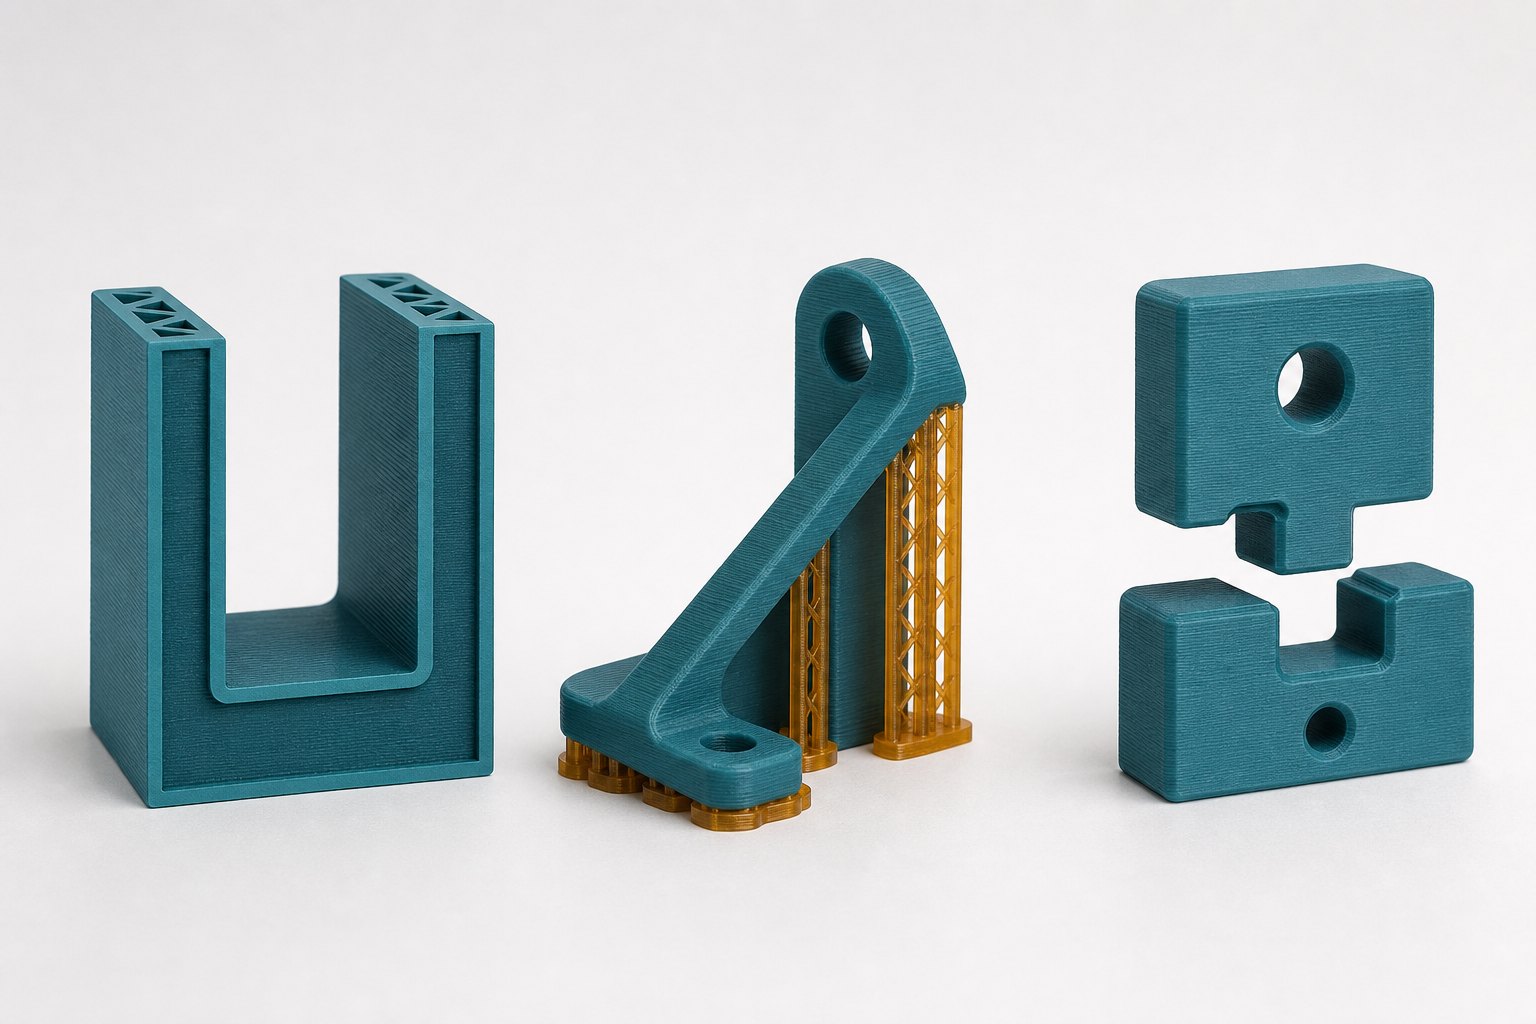
Orientation and supports are where print cost can move quickly. A flat decorative model may print cheaply in one direction and become support-heavy in another. A bracket may look strong standing upright but be weaker across the layer direction than it would be printed on its side. You do not need to solve every orientation decision before uploading, but it helps to mark critical faces that must look clean and surfaces that can tolerate support marks.
Think about what the part needs to do. A desk model, a fit-check prototype and a load-bearing bracket are not the same job, even if the file volume is identical. If the part is only for appearance, say that. If it must hold weight, resist heat, flex, clip, sit outdoors or be drilled after printing, include those details. Our functional parts printing service is built around this kind of context, because strength depends on material, wall design, infill, orientation and the way the part will actually be used.
For prototypes, tell us what you are trying to learn. A first concept print might prioritise speed and low cost. A second prototype may need a cleaner finish, tighter fit or a stronger material. A presentation model may be better suited to resin if surface detail matters, while a working housing may be better as FDM. The same file can lead to different quotes depending on the purpose, so a short brief helps avoid over-specifying the wrong thing.
If you are ordering more than one part, include quantities early. Small batch printing is not always priced as one print multiplied by ten. Build layout, repeated setup, support removal and packing can change the best route. For a small batch quote, send the whole part set together and list the quantity for each file. If some parts are optional or still being revised, label them clearly in the project notes.
Clean geometry also helps. Remove duplicate shells, hidden bodies, tiny leftover fragments and unused CAD exports before sending the final version. Make sure the mesh is watertight where possible, normals face the right way and the model represents a real solid object rather than a collection of loose surfaces. If you are unsure, upload the file anyway and ask for file feedback. It is better to flag a printability concern before production than discover it after a failed print.
Mesh export quality is worth a quick look as well. Curved faces should not turn into visibly chunky polygons unless that faceted style is intentional. At the same time, there is rarely a benefit in sending a huge mesh with millions of triangles for a simple bracket or spacer. Export with enough detail to describe the part accurately, then reopen the exported file and check that circles, fillets and curved surfaces still look right. If the file has become unusually large, a cleaner STEP file or a lighter mesh export may be easier to review.
Version control can save time on quote emails too. Use filenames that make sense to a human, such as enclosure-left-v3.stl or bracket-assembly-final.step, rather than export1.stl or new-new-final.stl. If you are comparing several versions, say which one is preferred and what changed between them. For assemblies, include only the parts that need printing unless the extra geometry is needed to understand fit. That helps keep the quote focused on the printable objects rather than surrounding reference models.
It also helps to separate fixed requirements from preferences. A fixed requirement might be a 6mm mounting hole, a maximum outside size, an area that must stay flat, or a face that must not have support marks. A preference might be colour, surface finish, layer height or a material you would like if it is sensible. If cost is more important than finish, say that. If finish is more important than the cheapest possible print, say that too. Clear priorities help us avoid quoting a part as if everything is equally critical.
Finally, avoid treating online material names as a guarantee. PLA, PETG, ABS, ASA, TPU, nylon and resin each have useful places, but the right choice depends on heat, toughness, detail, flexibility, finish and budget. Wikipedia has a useful general overview of 3D printing if you want background on the wider process, but your quote notes should focus on the real job: what the part is, how many you need, when you need it and what it has to survive.
A prepared 3D model does not need to answer every production question. It should simply remove the avoidable uncertainty. Send a clean file, confirm scale, mention critical features, explain the part's purpose and include quantity, material preference and deadline. From there, we can quote the fastest and cheapest sensible print route, or tell you what needs changing before the part is ready.